
前面我们了解到 OpenObserve 的装配置架构支持单节点和 HA 两种模式,接下来我们来了解下 OpenObserve 的式安 HA 模式是如何使用的。


OpenObserve 可以在裸机服务器、装配置虚拟机、式安Kubernetes 和其他平台上以 HA 模式安装和运行,装配置但目前官方提供的式安使用 Helm Chart 的安装方式,所以需要提前准备一个可用的装配置 Kubernetes 集群。

由于 HA 模式不支持本地磁盘存储,式安因此必须配置对象存储(例如 s3、装配置minio、式安gcs 等等),这里我们就以 minio 为例进行说明。
首先添加 openobserve 的 helm 仓库:
$ helm repo add openobserve https://charts.openobserve.ai$ helm repo update# 或者直接 clone chart 仓库$ git clone https://github.com/openobserve/openobserve-helm-chart.git然后可以使用下面的命令来获取 helm chat 包:
$ tree openobserve-helm-chartopenobserve-helm-chart├── Chart.lock├── Chart.yaml├── LICENSE├── README.md├── charts│ ├── etcd-8.10.1.tgz│ ├── etcd-8.11.4.tgz│ └── minio-5.0.7.tgz├── index.yaml├── publish.sh├── templates│ ├── NOTES.txt│ ├── _helpers.tpl│ ├── alertmanager-deployment.yaml│ ├── alertmanager-service.yaml│ ├── compactor-deployment.yaml│ ├── compactor-hpa.yaml│ ├── compactor-service.yaml│ ├── configmap.yaml│ ├── ingester-hpa.yaml│ ├── ingester-service.yaml│ ├── ingester-statefulset.yaml│ ├── ingress.yaml│ ├── issuer.yaml│ ├── querier-deployment.yaml│ ├── querier-hpa.yaml│ ├── querier-service.yaml│ ├── router-deployment.yaml│ ├── router-hpa.yaml│ ├── router-service.yaml│ ├── secret.yaml│ ├── serviceaccount.yaml│ ├── zplane-deployment.yaml│ ├── zplane-ingress.yaml│ └── zplane-service.yaml└── values.yaml2 directories, 34 files整个包里面还包括 etcd 和 minio 两个依赖的 helm chart 包,创建一个 oo-values.yaml 文件,然后添加如下内容:
auth: ZO_ROOT_USER_EMAIL: "root@example.com" ZO_ROOT_USER_PASSWORD: "root321" # 启用了 minio 不用设置这个 # ZO_S3_ACCESS_KEY: "console" # ZO_S3_SECRET_KEY: "console123"config: # ZO_S3_SERVER_URL: "http://minio:9000" # 启用了 minio 不用设置这个 ZO_S3_BUCKET_NAME: "openobserve" ZO_S3_REGION_NAME: "us-east-1" ZO_S3_PROVIDER: "minio" # 只有在使用 minio 进行对象存储时才需要设置这个,如果启用了minio,将会自动设置。 ZO_TELEMETRY: "false" # 发送匿名遥测信息以改进OpenObserve,您可以将其设置为false来禁用。 # ZO_ETCD_ADDR: "openobserve-etcd-headless.openobserve.svc.cluster.local:2379" # etcd endpoint,启用 etcd 会自动配置 ZO_DATA_DIR: "./data/" # 指定数据目录,主要是 WAL 日志 ZO_WAL_MEMORY_MODE_ENABLED: "false" # 开启内存模式,开启后不再写入本地文件,wal的数据直接在内存中,然后从内存转存到对象存储,为了解决某些云服务器,本地磁盘性能很差的问题,但是需要大内存。 ZO_WAL_LINE_MODE_ENABLED: "true" # wal的写入模式,一般写入数据的时候都会批量写入,但是这有个潜在的风险。比如你一次写入了10k数据,如果我一次性写入wal,有可能遇到系统崩溃,掉电,这一批数据不知道断在哪儿,wal文件会出错。可能写入了一半。如果开启line模式,就是虽然你是一次给了我10k数据,我写入wal的时候,一行行的调用write接口,这样wal损坏的可能性小一些,但是性能稍微差一些。replicaCount: # 可以根据需要调整副本数 ingester: 1 querier: 1 router: 1 alertmanager: 1 compactor: 1ingester: persistence: # 持久化 data 目录,主要是 WAL 日志 enabled: true size: 10Gi storageClass: "cfsauto" # 指定可用的 storage class accessModes: - ReadWriteOnceingress: enabled: true className: "nginx" annotations: nginx.ingress.kubernetes.io/enable-cors: "true" nginx.ingress.kubernetes.io/connection-proxy-header: keep-alive nginx.ingress.kubernetes.io/proxy-connect-timeout: "600" nginx.ingress.kubernetes.io/proxy-send-timeout: "600" nginx.ingress.kubernetes.io/proxy-read-timeout: "600" nginx.ingress.kubernetes.io/proxy-body-size: 32m hosts: - host: oo.k8s.local paths: - path: / pathType: ImplementationSpecificetcd: enabled: true # 指定 etcd 是否启用 replicaCount: 1 # 奇数 persistence: size: 20Gi storageClass: "cfsauto" # 指定可用的 storage class accessModes: - ReadWriteOnceminio: enabled: true # 指定 minio 是否启用 region: "us-east-1" rootUser: rootuser rootPassword: rootpass123 drivesPerNode: 1 replicas: 2 mode: distributed # or standalone buckets: - name: openobserve policy: none purge: false persistence: enabled: true size: 10Gi storageClass: "cfsauto" # 指定可用的 storage class accessModes: - ReadWriteOnce consoleIngress: enabled: true ingressClassName: "nginx" annotations: kubernetes.io/ingress.allow-http: "true" nginx.ingress.kubernetes.io/secure-backends: "true" nginx.ingress.kubernetes.io/whitelist-source-range: 0.0.0.0/0 path: / hosts: - minio.k8s.local在这个文件中我们指定了管理员的邮箱和密码,还有对象存储的相关配置,然后指定了 etcd 和 minio 的相关配置,要注意 auth 和 config 部分的配置,如果启用了 minio,那么 ZO_S3_ACCESS_KEY、ZO_S3_SECRET_KEY、ZO_S3_SERVER_URL 这些配置都可以省略,因为这些配置项会自动设置,包括如果启用了 etcd,ZO_ETCD_ADDR 参数也会自动配置。
另外我们可以看到 ingester 组件我们配置了数据持久化,这主要是为了对 WAL 日志数据的持久化,关于 WAL 主要有两种模式:
所以如果我们使用内存模式的话理论上可以不用持久化数据目录,但有一种情况会落盘,就是当内存中还有数据的时候程序接收到关闭指令,会把内存中的数据 dump 到磁盘,下次启动的时候再转移到对象存储中去。
更多配置可以参考官方文档关于环境变量的说明:https://openobserve.ai/docs/environment-variables/。
然后使用如下命令即可一件安装 OpenObserve:
$ helm upgrade --install openobserve -f oo-values.yaml --namespace openobserve ./openobserve-helm-chartRelease "openobserve" does not exist. Installing it now.NAME: openobserveLAST DEPLOYED: Thu Aug 10 15:31:37 2023NAMESPACE: openobserveSTATUS: deployedREVISION: 1TEST SUITE: NoneNOTES:1. Get the application URL by running these commands: http://oo.k8s.local/安装后我们可以查看一下 OpenObserve 的 Pod 状态:
$ kubectl get pods -n openobserveNAME READY STATUS RESTARTS AGEopenobserve-alertmanager-7957d8fb79-xzh8z 1/1 Running 4 (31m ago) 32mopenobserve-compactor-d679d4765-gpkgk 1/1 Running 4 (31m ago) 32mopenobserve-etcd-0 1/1 Running 0 32mopenobserve-ingester-0 1/1 Running 0 4m31sopenobserve-minio-0 1/1 Running 0 32mopenobserve-minio-1 1/1 Running 0 32mopenobserve-querier-56456d48c5-dth52 1/1 Running 4 (31m ago) 32mopenobserve-router-7bd4fcbc6c-nrmbs 1/1 Running 3 (32m ago) 32mprometheus-756c8c78f5-gkwl8 1/1 Running 0 2d$ kubectl get svc -n openobserveNAME TYPE CLUSTER-IP EXTERNAL-IP PORT(S) AGEopenobserve-alertmanager ClusterIP 10.102.247.215 <none> 5080/TCP 71mopenobserve-compactor ClusterIP 10.96.24.228 <none> 5080/TCP 71mopenobserve-etcd ClusterIP 10.103.96.225 <none> 2379/TCP,2380/TCP 71mopenobserve-etcd-headless ClusterIP None <none> 2379/TCP,2380/TCP 71mopenobserve-ingester ClusterIP 10.108.17.186 <none> 5080/TCP 71mopenobserve-minio ClusterIP 10.108.196.221 <none> 9000/TCP 71mopenobserve-minio-console ClusterIP 10.103.65.90 <none> 9001/TCP 71mopenobserve-minio-svc ClusterIP None <none> 9000/TCP 71mopenobserve-querier ClusterIP 10.99.221.44 <none> 5080/TCP 71mopenobserve-router ClusterIP 10.101.230.112 <none> 5080/TCP 71m$ kubectl get ingress -n openobserveNAME CLASS HOSTS ADDRESS PORTS AGEopenobserve nginx oo.k8s.local 10.98.12.94 80 53mopenobserve-minio-console nginx minio.k8s.local 10.98.12.94 80 53m可以看到 OpenObserve 的几个组件 Router、Querier、Ingester、Alertmanager、Compactor、Minio、Etcd 都已经正常运行了,此外我们为 MinIO 和 OpenObserve 都添加了 Ingress,只需要将 oo.k8s.local 和 minio.k8s.local 映射到 Ingress 控制器即可访问。
比如现在我们可以通过 minio.k8s.local 来访问 MINIO 的 UI 界面:
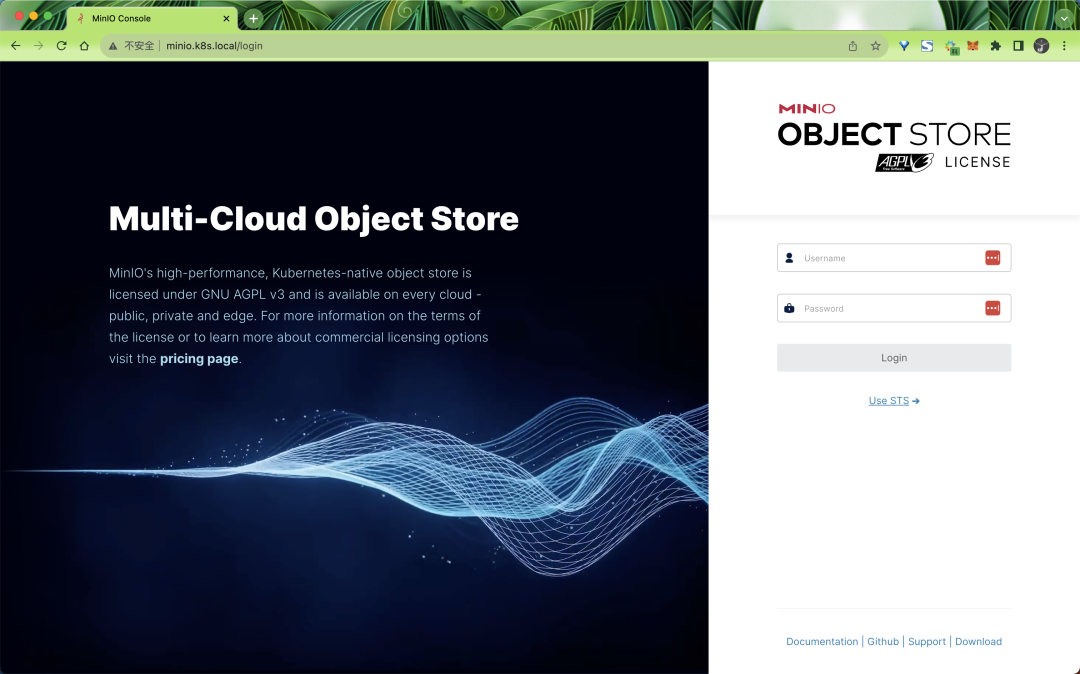
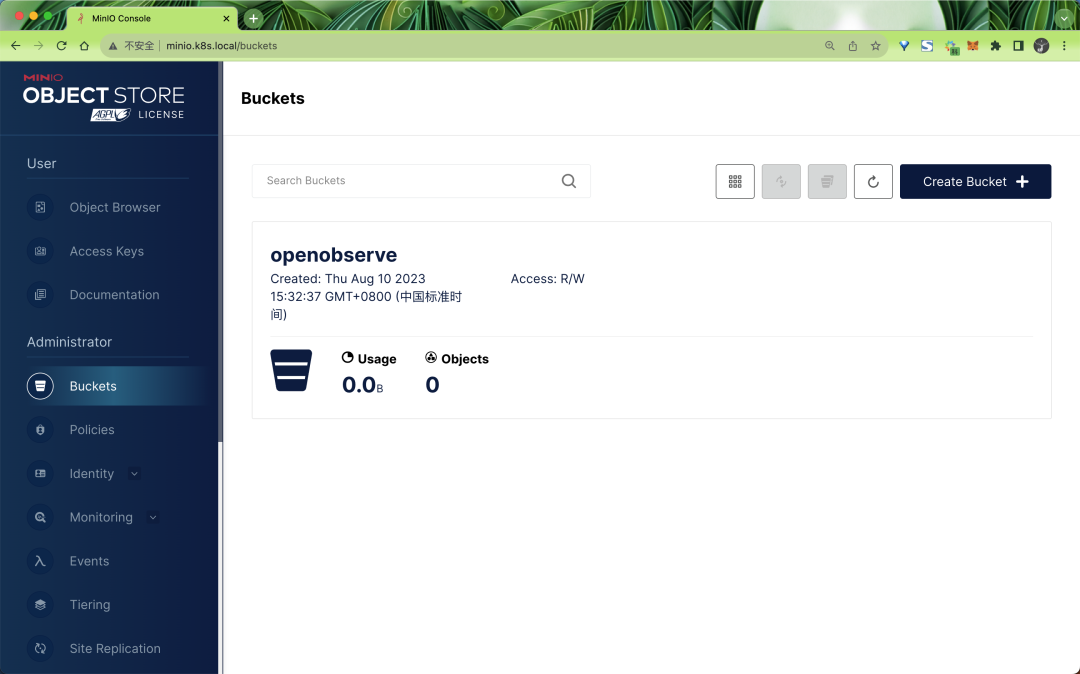
使用用户名 rootuser 和密码 rootpass123 即可登录成功。
可以看到指定的 openobserve bucket 也已经创建成功了:
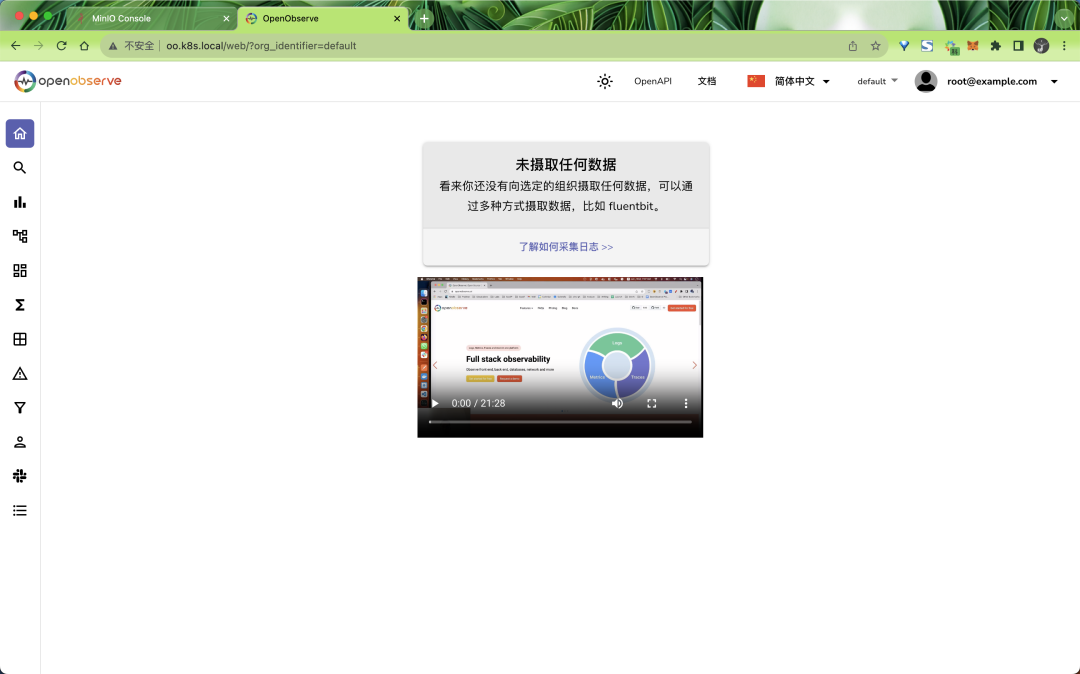
同样我们也可以通过 oo.k8s.local 来访问 OpenObserve 的 UI 界面:

只是现在还没有任何数据:
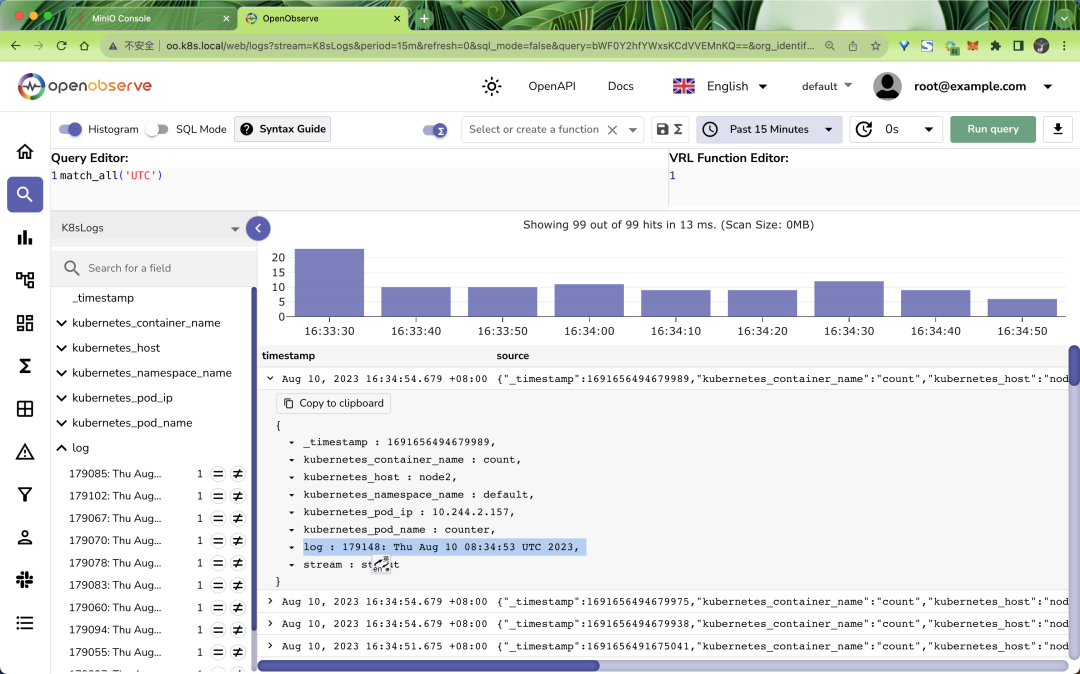
接下来我们只需要将前面日志、指标、链路追踪的数据发送到新的 OpenObserve 地址 http://openobserve-router.openobserve.svc.cluster.local:5080 即可,比如前面我们已经部署的 Fluentd,只需要将日志输出地址修改即可:
# fluentd.yaml# ...... 省略部分配置output.conf: |- <match **> @type http # 使用http插件 endpoint http://openobserve-router.openobserve:5080/api/default/K8sLogs/_json # 指定接收日志的地址 content_type json json_array true <auth> method basic username root@example.com password root321 </auth> <buffer> flush_interval 2s # 每2秒发送一次 </buffer> </match>然后重启 fluentd 即可,隔一会儿就可以在 OpenObserve 的 UI 界面中看到日志数据了:
同样对于 Prometheus 也是一样的,只需要修改 Prometheus 的配置文件中的远程写入地址即可:
remote_write: # 写入到远程 OO,url 是远程写入接口地址 - url: http://openobserve-router.openobserve:5080/api/default/prometheus/api/v1/write basic_auth: username: root@example.com password: root321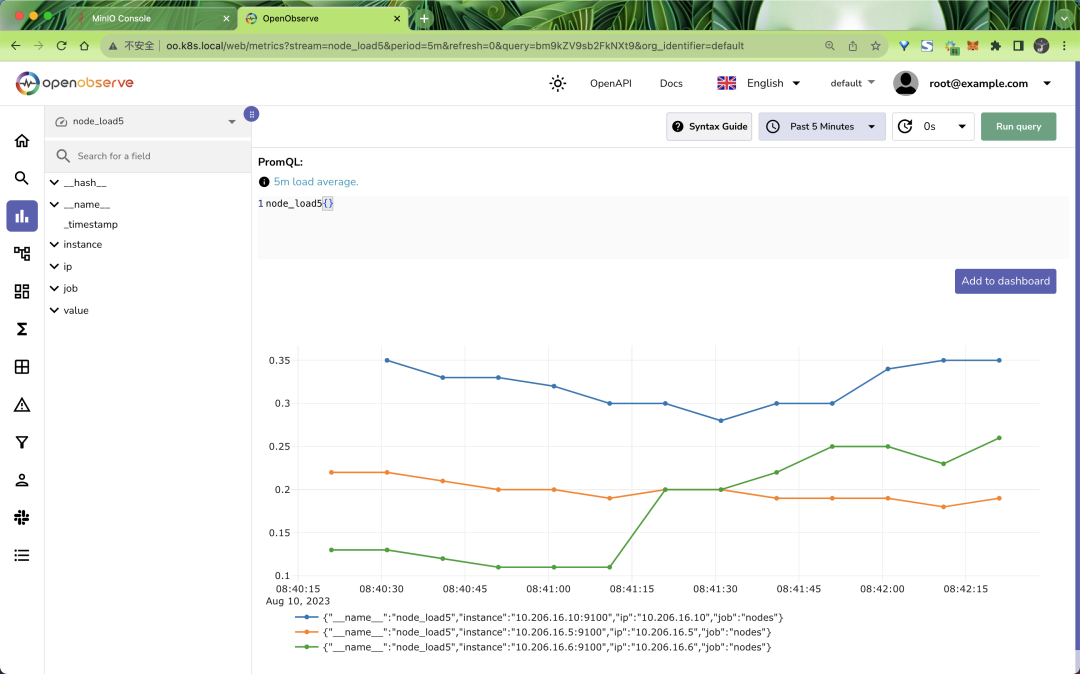
对于链路追踪数据也是一样的,只需要修改 OpenTelemetry Collector 的配置文件中的远程写入地址即可。
最后我们可以去 MINIO 中验证下数据是否已经写入到对象存储中了:

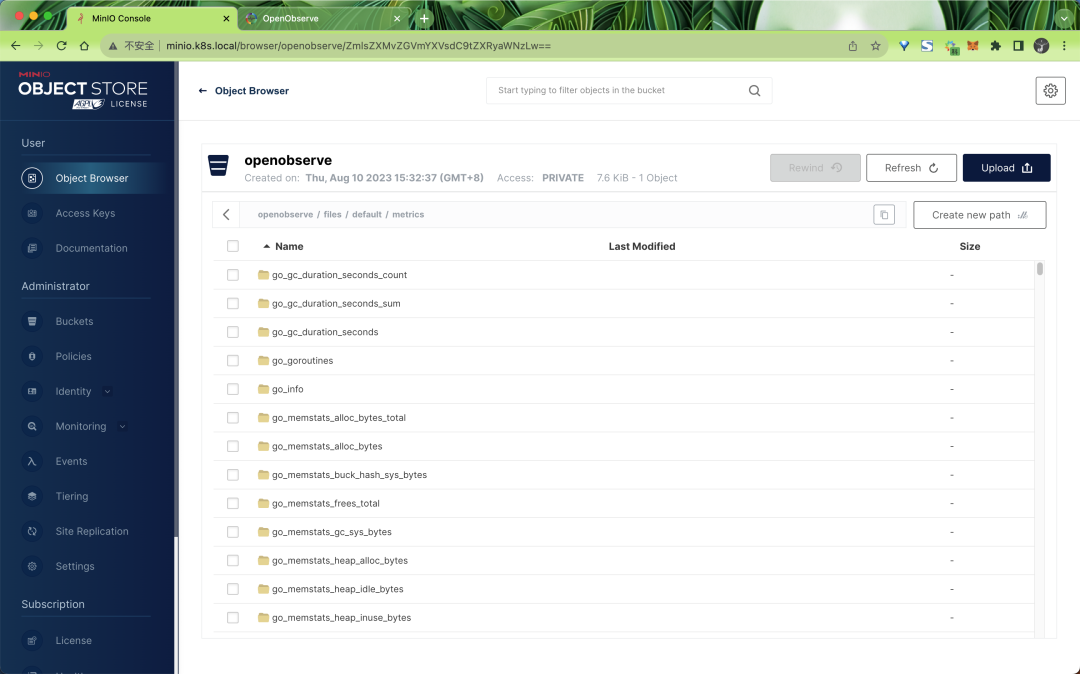
不过需要注意的是数据并不是实时上传到对象存储中的,默认 10 分钟或者 WAL 达到 32MB 后会上传一次。
到这里 OpenObserve 的 HA 模式就部署完成了,我们可以根据需要设置各个组件的副本数量进行横向扩展,也可以启用 HPA 来自动扩缩容。
其他更多功能请参考官方文档 https://openobserve.ai/docs/ 以了解更多相关信息。
责任编辑:姜华 来源: k8s技术圈 KubernetesHA 模式(责任编辑:知识)
为什么借呗变成信用贷后借不出来了 金融机构无法正常放款了吗?
 借呗变成信用贷后,虽然服务主体变了,但只要还有额度就可以去借款的。可是有不少人表示借呗变成信用贷后借不出来了,那么这是什么原因导致的,需要怎么解决呢?这里就给大家来简单介绍下,一起看看吧。为什么借呗变
...[详细]
借呗变成信用贷后,虽然服务主体变了,但只要还有额度就可以去借款的。可是有不少人表示借呗变成信用贷后借不出来了,那么这是什么原因导致的,需要怎么解决呢?这里就给大家来简单介绍下,一起看看吧。为什么借呗变
...[详细] 安徽文旅迎来虎年“开门红”!记者从安徽省文化和旅游厅获悉,据测算,刚刚过去的春节假期,我省共接待游客总数2317万人次,实现旅游收入146.8亿元,同比分别增长10.5%、12
...[详细]
安徽文旅迎来虎年“开门红”!记者从安徽省文化和旅游厅获悉,据测算,刚刚过去的春节假期,我省共接待游客总数2317万人次,实现旅游收入146.8亿元,同比分别增长10.5%、12
...[详细] 可转债可以一个人多个账户申购吗可转债不可以一个人多个账户申购。根据相关规定,投资者在参与可转债网上申购时,只能使用一个证券账户。同一投资者使用多个证券账户参与同一只可转债申购的,以及使用同一证券账户多
...[详细]
可转债可以一个人多个账户申购吗可转债不可以一个人多个账户申购。根据相关规定,投资者在参与可转债网上申购时,只能使用一个证券账户。同一投资者使用多个证券账户参与同一只可转债申购的,以及使用同一证券账户多
...[详细] 大家都知道,很多人都是通过微信或支付宝转账,主要还是方便快捷。有人在转账时设置了24小时到账,那么微信转账24小时到账中途可以取消吗?其实过程还是比较麻烦的,跟小编一起去看看吧。微信转账设置24小时到
...[详细]
大家都知道,很多人都是通过微信或支付宝转账,主要还是方便快捷。有人在转账时设置了24小时到账,那么微信转账24小时到账中途可以取消吗?其实过程还是比较麻烦的,跟小编一起去看看吧。微信转账设置24小时到
...[详细]2022年全球人工智能软件市场规模将达625亿美元 相比2021年增长21.3%
 11月30日,据市场机构Gartner预测,2022年全球人工智能(AI)软件收入总额预计将达625亿美元,相比2021年增长21.3%。Gartner认为,2022年人工智能软件支出的前五个用例类别
...[详细]
11月30日,据市场机构Gartner预测,2022年全球人工智能(AI)软件收入总额预计将达625亿美元,相比2021年增长21.3%。Gartner认为,2022年人工智能软件支出的前五个用例类别
...[详细] 1月份,唐山港京唐港区完成吞吐量2530万吨,同比提高6.7%,其中矿建材料吞吐量增势迅猛,完成297万吨,同比提高241.4%;煤炭吞吐量上扬态势明显,完成1171万吨,同比提高11.7%;集装箱运
...[详细]
1月份,唐山港京唐港区完成吞吐量2530万吨,同比提高6.7%,其中矿建材料吞吐量增势迅猛,完成297万吨,同比提高241.4%;煤炭吞吐量上扬态势明显,完成1171万吨,同比提高11.7%;集装箱运
...[详细] 基金补仓要手续费吗基金补仓也是需要手续费的,其实基金补仓的本质就是在持有基金的基础上,再次买入基金的行为,而买入基金的时候就是需要支付申购费的。基金的申购费是根据成交金额而有所不同,往往成交金额越大,
...[详细]
基金补仓要手续费吗基金补仓也是需要手续费的,其实基金补仓的本质就是在持有基金的基础上,再次买入基金的行为,而买入基金的时候就是需要支付申购费的。基金的申购费是根据成交金额而有所不同,往往成交金额越大,
...[详细] 资料显示,信托是一种理财方式,也是一种特殊的财产管理制度和法律行为,同时又是一种金融制度。不少人很是好奇,信托是一种什么业务?产品风险大吗?下面,我们一起来具体了解一下吧。据悉,信托是指委托人基于对受
...[详细]
资料显示,信托是一种理财方式,也是一种特殊的财产管理制度和法律行为,同时又是一种金融制度。不少人很是好奇,信托是一种什么业务?产品风险大吗?下面,我们一起来具体了解一下吧。据悉,信托是指委托人基于对受
...[详细]天津证监局召开2022年辖区期货监管工作会议 结合实际提出监管要求
 为深入贯彻落实2022年证监会系统工作会议和期货监管工作会议要求,4月26日,天津证监局组织召开2022年辖区期货监管工作会议。会议总结了2021年辖区期货监管工作,剖析了行业规范发展存在的不足,结合
...[详细]
为深入贯彻落实2022年证监会系统工作会议和期货监管工作会议要求,4月26日,天津证监局组织召开2022年辖区期货监管工作会议。会议总结了2021年辖区期货监管工作,剖析了行业规范发展存在的不足,结合
...[详细] 2月7日,记者从市工信局获悉,洛阳市去年积极推进新一轮更高水平、更深层次“三大改造”,实施“三大改造”重点项目438个,共投资353.8亿元,占年度计划
...[详细]
2月7日,记者从市工信局获悉,洛阳市去年积极推进新一轮更高水平、更深层次“三大改造”,实施“三大改造”重点项目438个,共投资353.8亿元,占年度计划
...[详细] 大别山革命老区正式迎来“高铁时代” 黄黄高铁正线全长126.85公里
 乌江榨菜上了微博热搜 产地在哪里?
 微众银行开通后收费吗 微众银行属于民营银行吗?
 中国能建承建的垃圾焚烧高参数机组正式投入商运 项目实现“双投”
 自己频繁查询征信有没有关系 查询记录要多久才会消除?