中文官网:https://www.atlassian.com/zh/software/jira


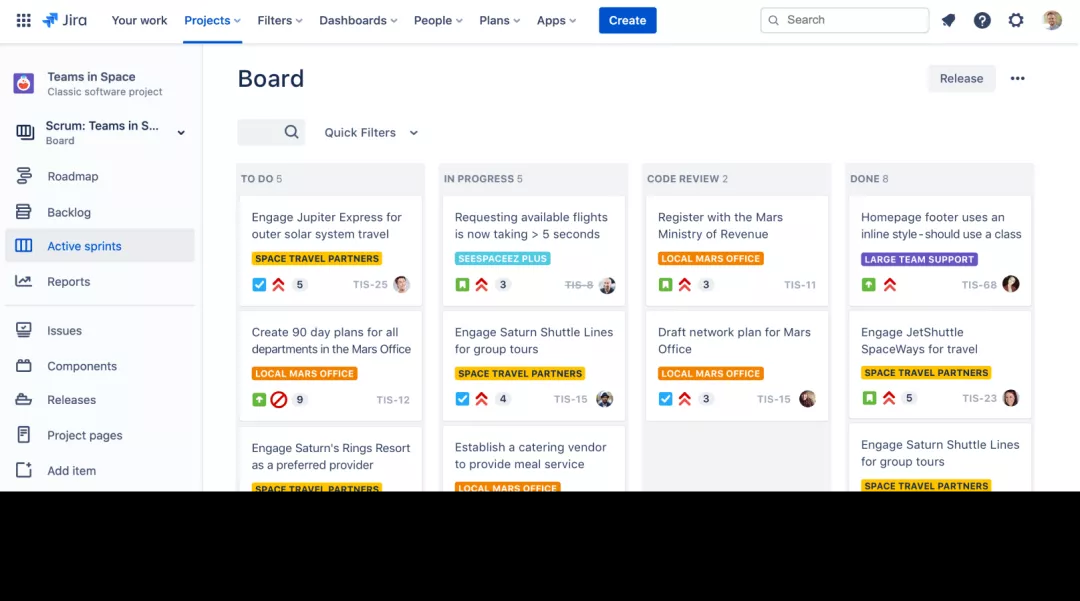
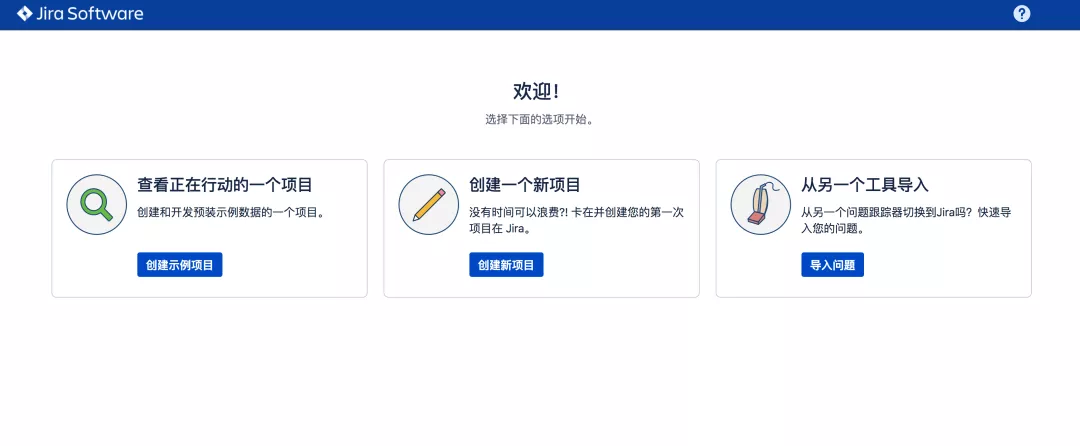
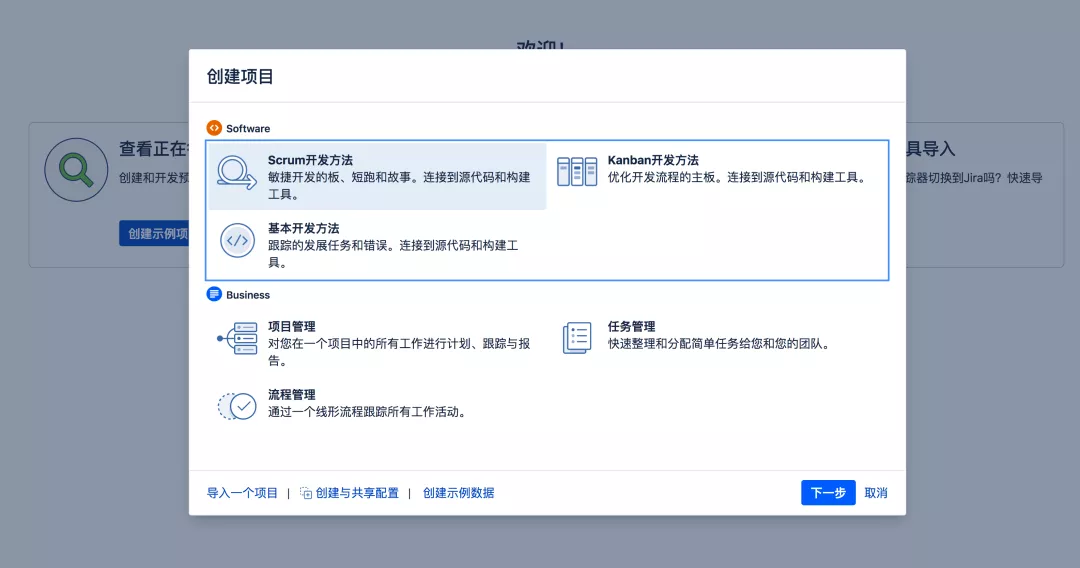
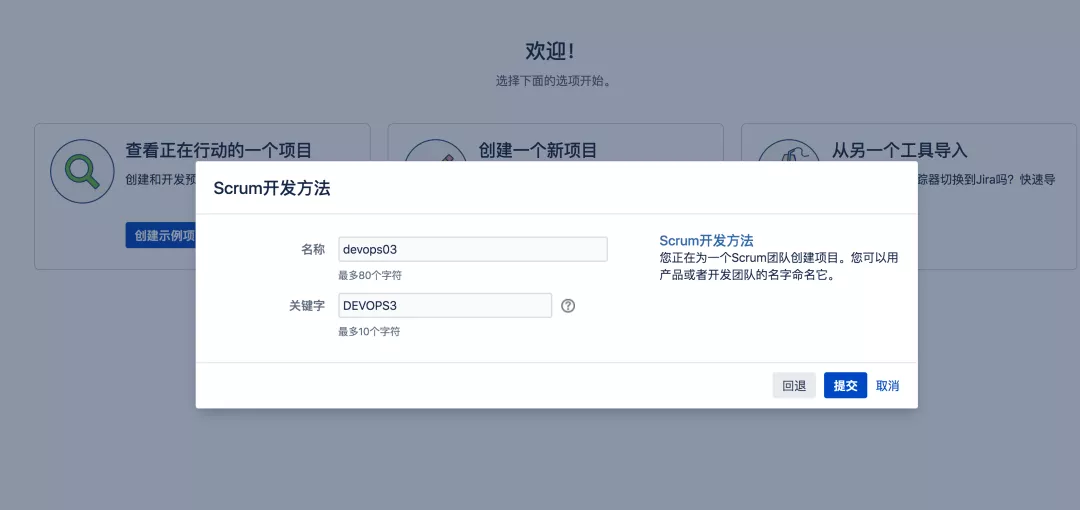
创建项目,用户需求和事务、化实规划 Sprint 并跨团队分配开发任务。践基基线

全面了解项目进度情况,实现安排整个团队工作的需求优先级排序并进行讨论。

https://www.atlassian.com/zh/software/jira/pricing?代码tab=data-center 试用

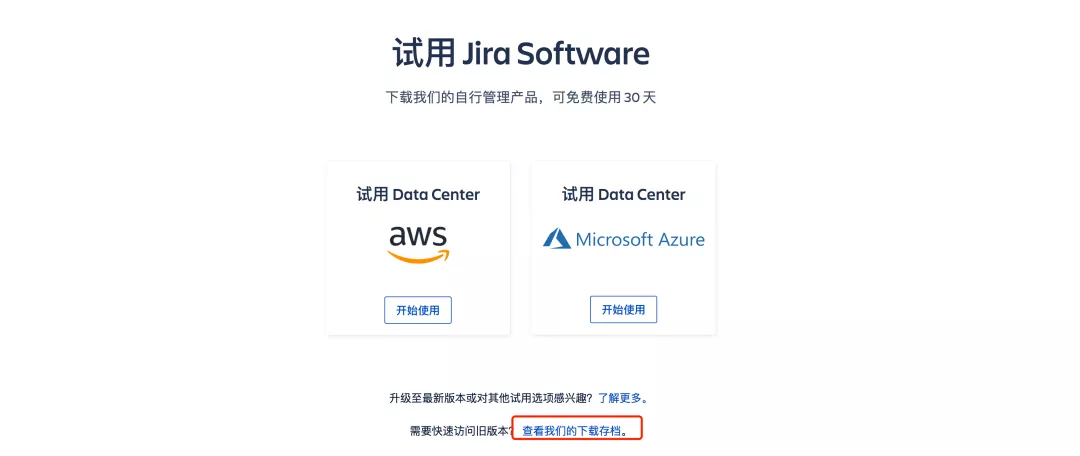
选择历史版本下载:
下载最新的LTS 长期支持版本:
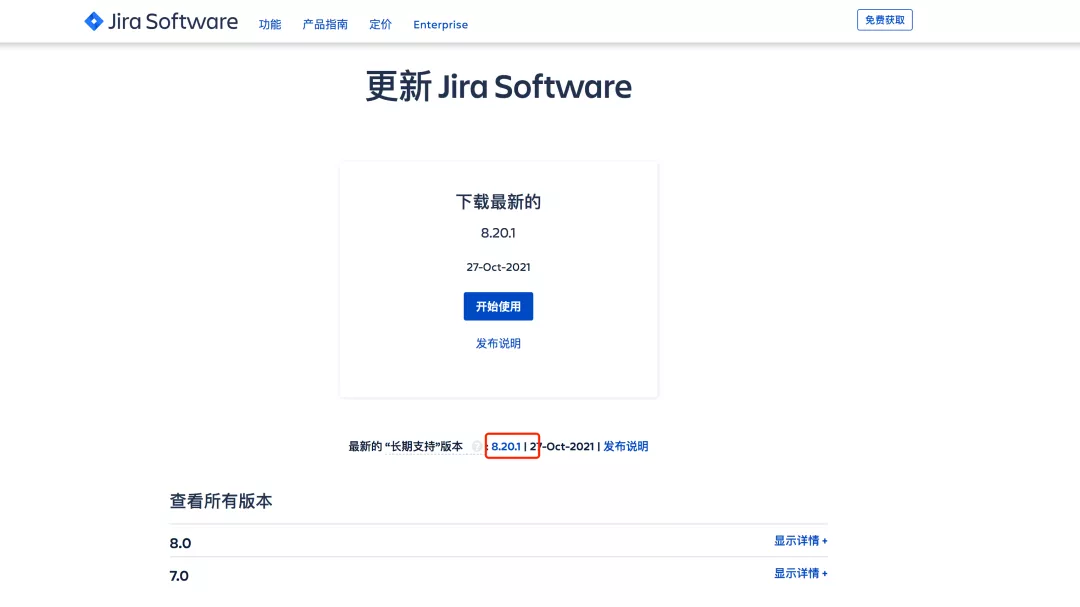
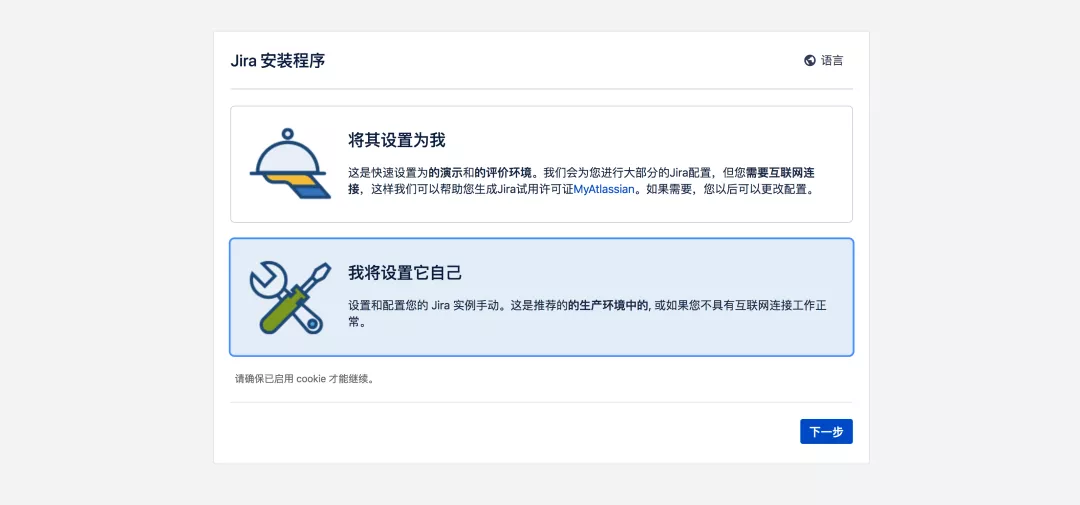
选择部署的环境:

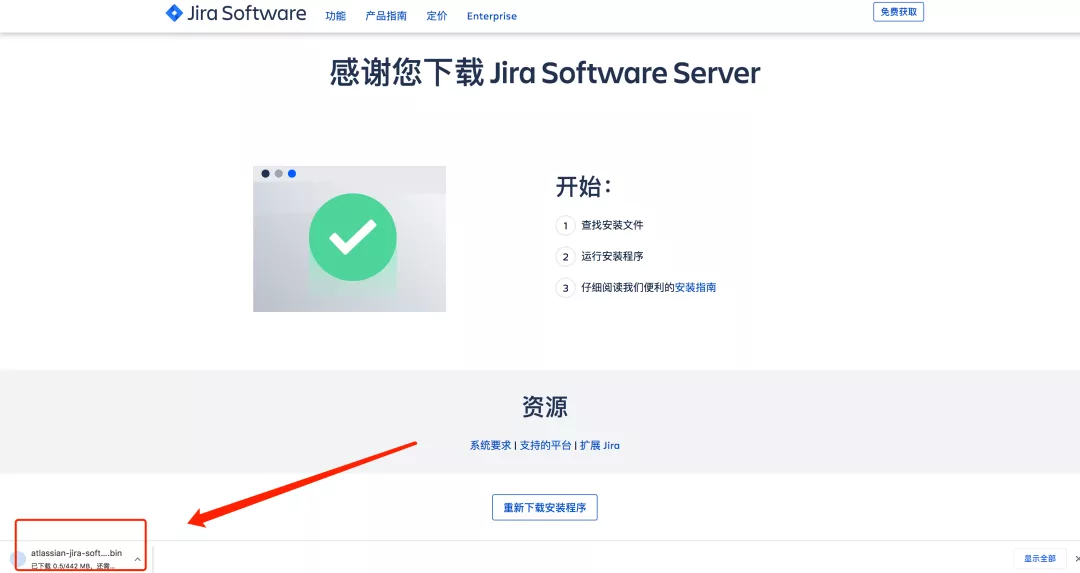
开始下载Jira Software Server安装程序:
- scp atlassian-jira-software-8.20.1-x64.bin root@192.168.1.200:/opt/
- ## 添加权限
- [root@zeyang-nuc-service opt]# chmod +x atlassian-jira-software-8.20.1-x64.bin
- ## 运行安装程序
- [root@zeyang-nuc-service opt]# ./atlassian-jira-software-8.20.1-x64.bin
- Unpacking JRE ...
- Starting Installer ...
- This will install Jira Software 8.20.1 on your computer.
- OK [o, Enter], Cancel [c] ## 回车
- Click Next to continue, or Cancel to exit Setup.
- Choose the appropriate installation or upgrade option.
- Please choose one of the following:
- Express Install (use default settings) [1], Custom Install (recommended for advanced users) [2, Enter], Upgrade an existing Jira installation [3]
- ## 此处选择自定义安装, 输入回车
- Select the folder where you would like Jira Software to be installed.
- Where should Jira Software be installed?关联
- [/opt/atlassian/jira]
- ## 选择安装目录
- Default location for Jira Software data
- [/var/atlassian/application-data/jira]
- ## 选择数据目录
- Configure which ports Jira Software will use.
- Jira requires two TCP ports that are not being used by any other
- applications on this machine. The HTTP port is where you will access Jira
- through your browser. The Control port is used to startup and shutdown Jira.
- Use default ports (HTTP: 8080, Control: 8005) - Recommended [1, Enter], Set custom value for HTTP and Control ports [2]
- 2 ## 输入2 自定义服务端口
- HTTP Port Number
- [8071]
- 8801
- Control Port Number
- [8077]
- 8802
- ## 安装服务
- Jira can be run in the background.
- You may choose to run Jira as a service, which means it will start
- automatically whenever the computer restarts.
- Install Jira as Service?
- Yes [y, Enter], No [n]
- y
- Details on where Jira Software will be installed and the settings that will be used.
- Installation Directory: /opt/atlassian/jira
- Home Directory: /var/atlassian/application-data/jira
- HTTP Port: 8801
- RMI Port: 8802
- Install as service: Yes
- Install [i, Enter], Exit [e]
- Extracting files ...
- ## 启动服务
- Please wait a few moments while Jira Software is configured.
- Installation of Jira Software 8.20.1 is complete
- Start Jira Software 8.20.1 now?
- Yes [y, Enter], No [n]
- y
- Please wait a few moments while Jira Software starts up.
- Launching Jira Software ...
- Installation of Jira Software 8.20.1 is complete
- Your installation of Jira Software 8.20.1 is now ready and can be accessed
- via your browser.
- Jira Software 8.20.1 can be accessed at http://localhost:8801
- Finishing installation ...
访问:http://serverip:8801
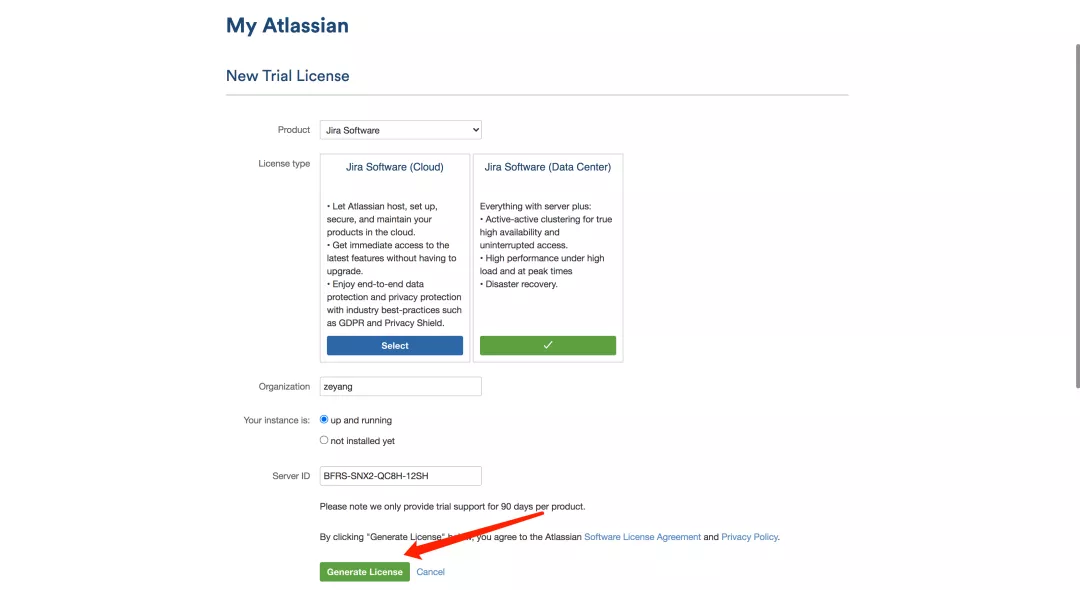
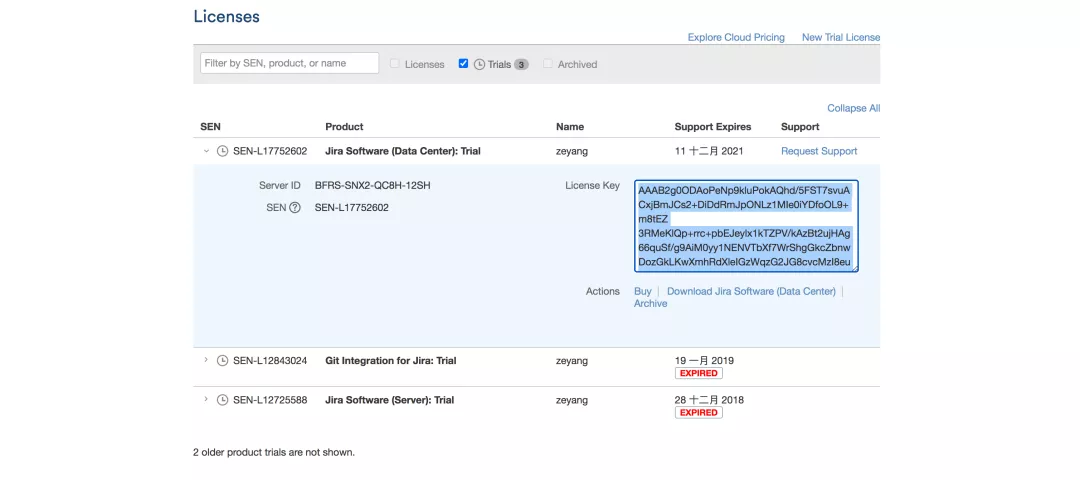
获取授权码:
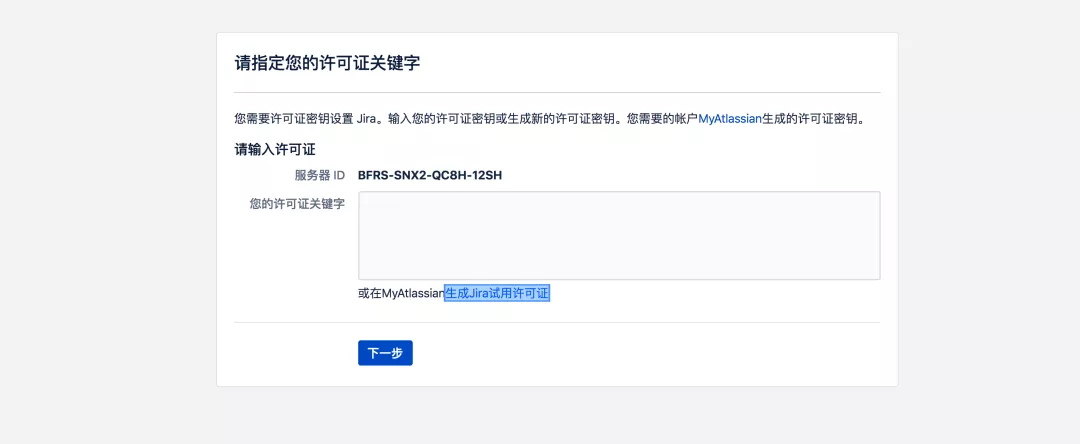
注册账号登录:生成授权码,激活实例;
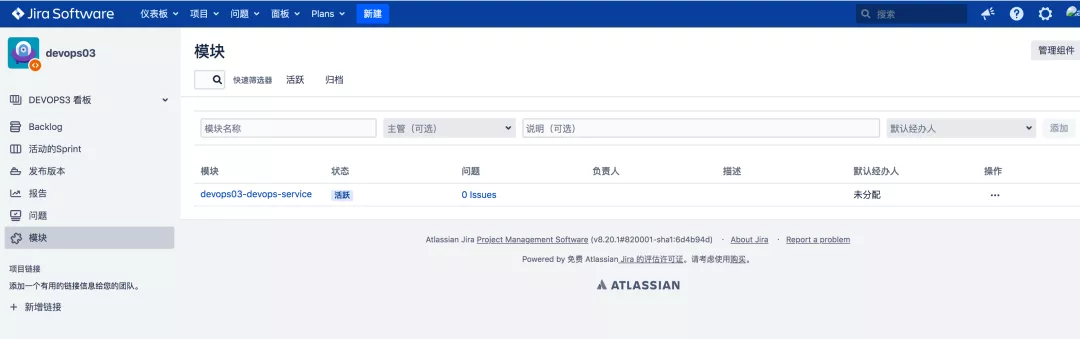
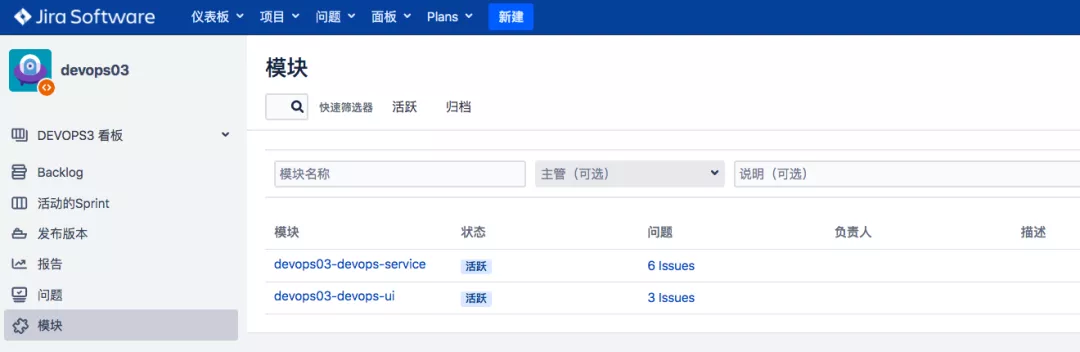
注意:一个Jira 项目对应一个GitLab项目组;
注意:一个Jira模块对应一个GitLab项目;
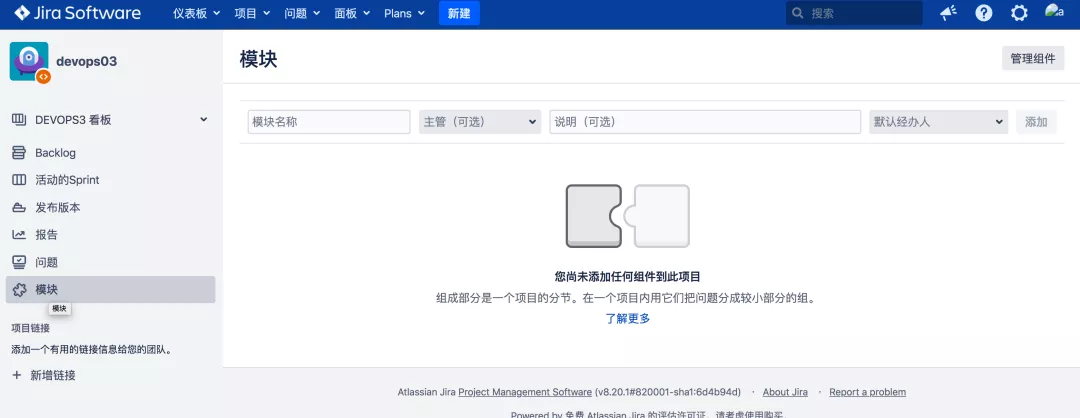
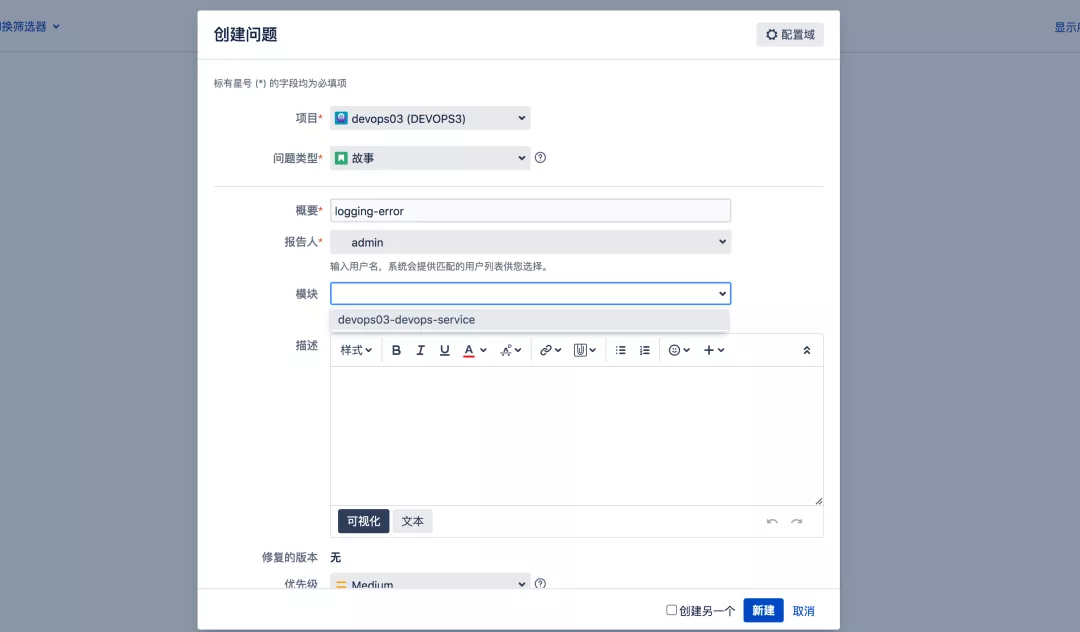
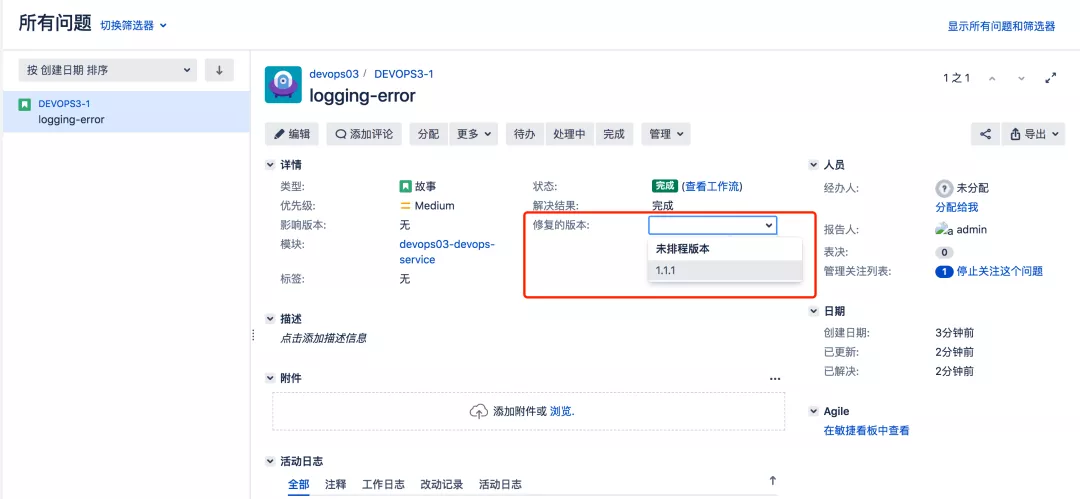
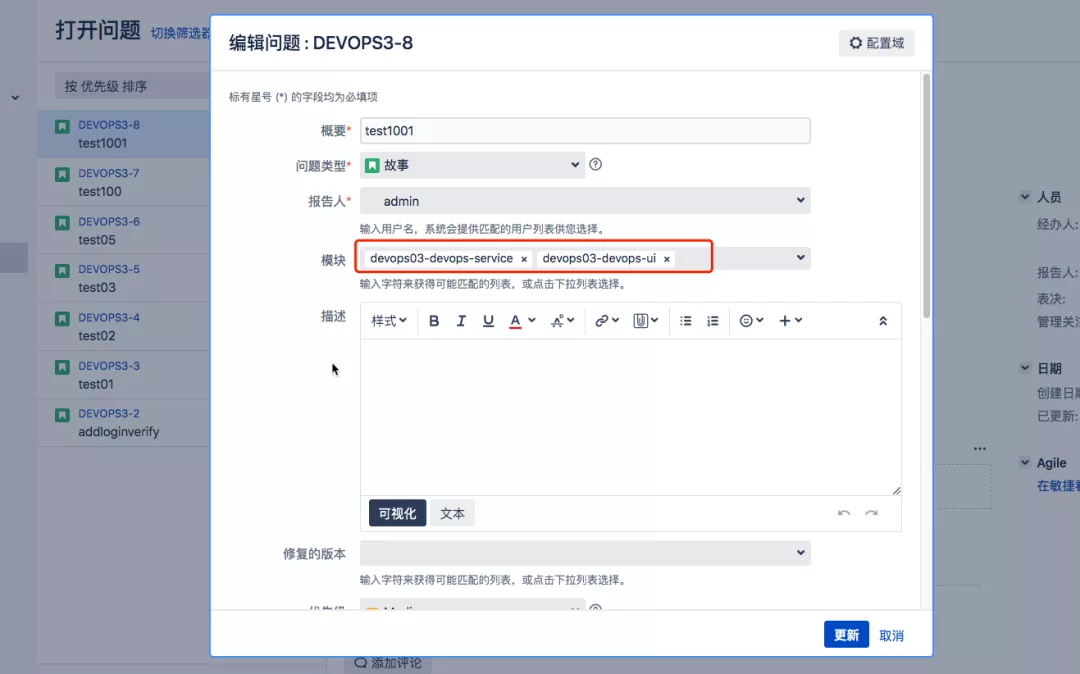
创建需求
这里在Jira上面把这个需求logging-error, 类型为故事 关联到devops03-devops-service模块;
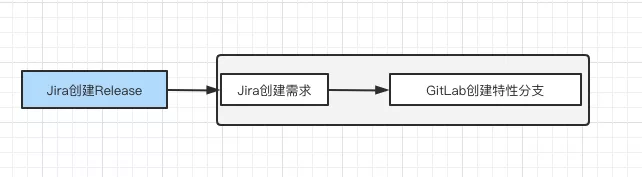
课程中把 发布对应为GitLab项目代码库中的版本分支;
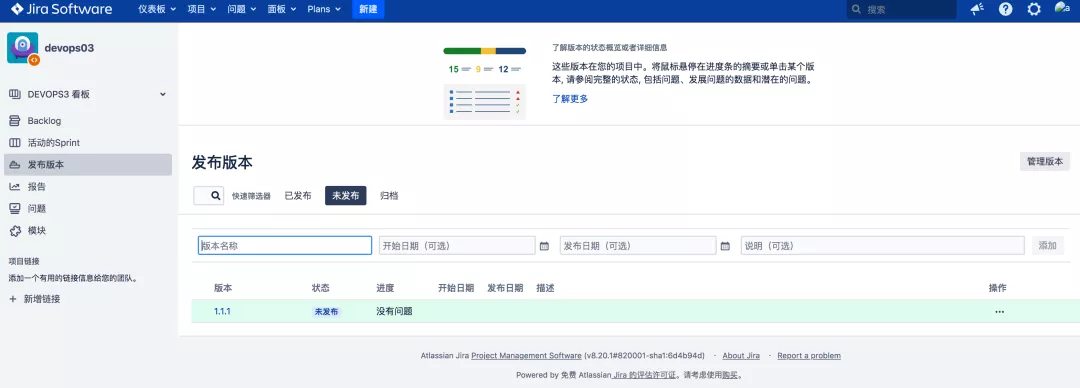
issue关联发布:可以想象成GitLab特性分支合并到版本分支;
工作流

工具链集成
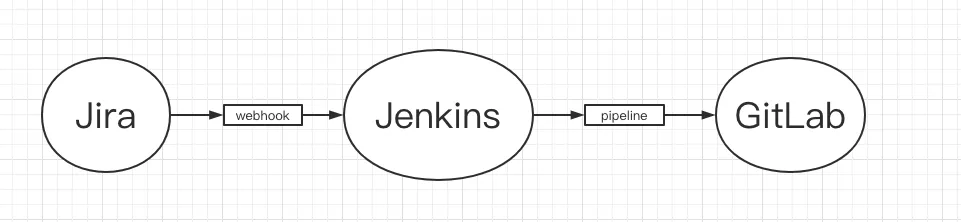
1. 创建Jenkins作业并配置webhook
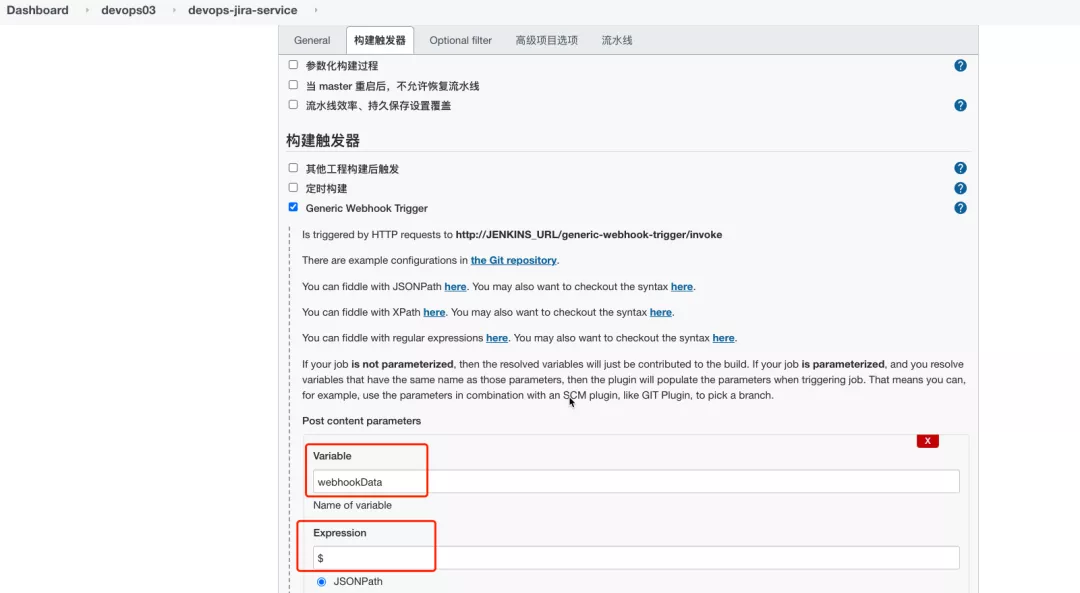
webhookData:这个变量存放的是Jira 传递的数据。
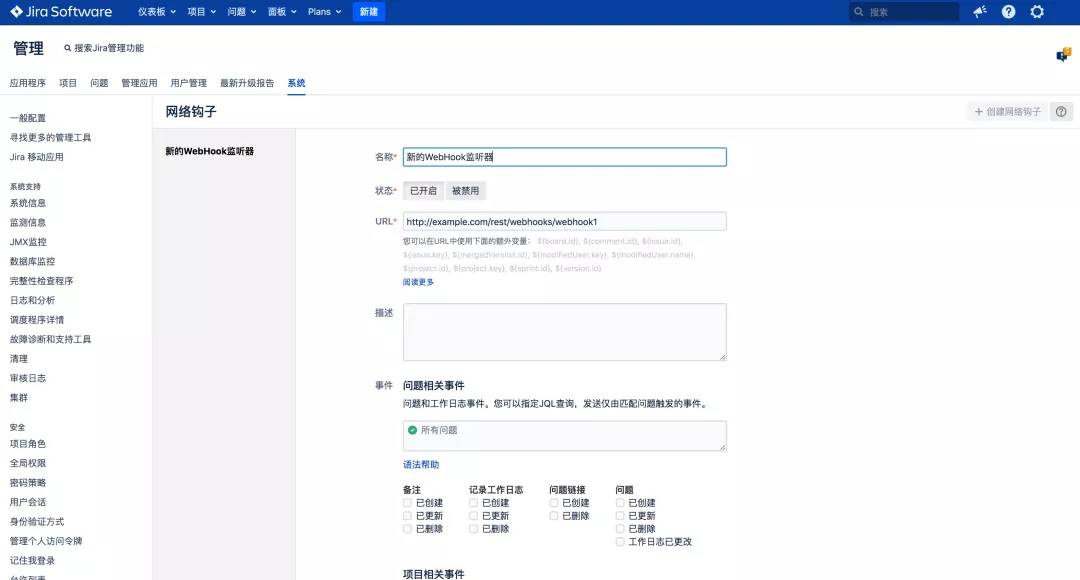
2. 为Jira配置一个系统级别的webhook
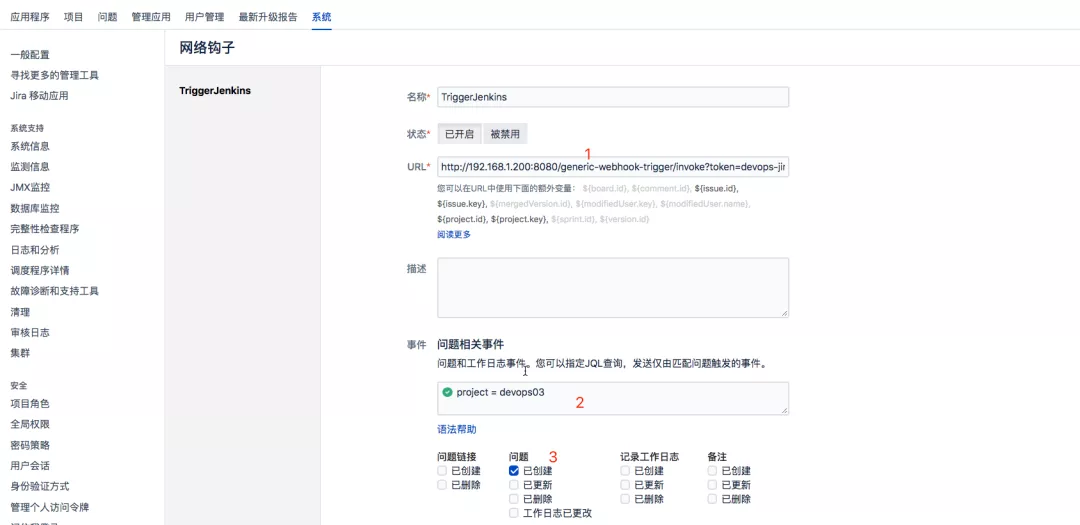
选项解释:
3. Jenkins流水线配置
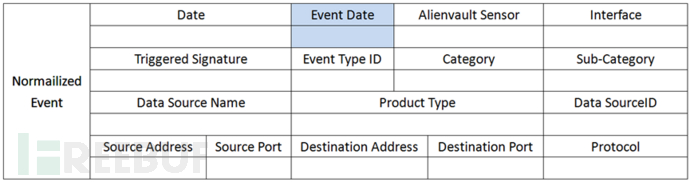
解析Jira传递过来的数据;
- webhookData = readJSON text: "${ webhookData}"
- // Jira事件
- jiraEvent = webhookData.webhookEvent
- jiraProjectName = webhookData.issue.fields.project.name
- // 获取gitlab参数
- gitlabProjects = []
- gitlabBranchName = webhookData.issue.key
- gitlabGroupName = jiraProjectName
- for (i in webhookData.issue.fields.components){
- gitlabProjects.add(i["name"])
- }
- currentBuild.description = "Trigger by ${ jiraEvent} \n project: ${ gitlabProjects} \n branch: ${ gitlabBranchName}"
封装GitLab API接口
https://docs.gitlab.com/ee/api/branches.html#create-repository-branch
- // 创建分支
- def CreateBranch(projectId, newBranchName, sourceBranchName){
- try {
- apiUrl = "projects/${ projectId}/repository/branches?branch=${ newBranchName}&ref=${ sourceBranchName}"
- response = HttpReq('POST', apiUrl, "")
- }
- catch(Exception e) {
- println(e)
- }
- }
- // 获取所有项目的id
- def GetProjectsId(gitlabGroupName, gitlabProjects){
- gitlabProjectIds = []
- for (project in gitlabProjects){
- id = GetProjectId(gitlabGroupName, project)
- println(id)
- if (id != 0){
- gitlabProjectIds.add(id)
- }
- }
- return gitlabProjectIds
- }
- // 根据项目名称获取项目id
- def GetProjectId(groupName, projectName){
- apiUrl = "projects?search=${ projectName}"
- response = HttpReq('GET', apiUrl, "")
- response = readJSON text: response.content - "\n"
- if (response.size() > 1){
- for (i in response){
- println(i["path_with_namespace"])
- println(groupName + projectName)
- if (i["path_with_namespace"] == "${ groupName}/${ projectName}"){
- println(i["id"])
- return i["id"]
- }
- }
- } else {
- return response[0]["id"]
- }
- }
- // 封装HTTP
- def HttpReq(reqType, reqUrl,reqBody ){
- def gitServer = "http://192.168.1.200/api/v4"
- withCredentials([string(credentialsId: '058b7907-ebe2-4d14-9b91-1ac72e071c59', variable: 'GITLABTOKEN')]) {
- response = httpRequest acceptType: 'APPLICATION_JSON_UTF8',
- consoleLogResponseBody: true,
- contentType: 'APPLICATION_JSON_UTF8',
- customHeaders: [[maskValue: false, name: 'PRIVATE-TOKEN', value: "${ GITLABTOKEN}"]],
- httpMode: "${ reqType}",
- url: "${ gitServer}/${ reqUrl}",
- wrapAsMultipart: false,
- requestBody: "${ reqBody}"
- }
- return response
- }
Pipeline主程序
- pipeline {
- agent { label "build" }
- stages{
- stage("Process"){
- steps{
- script{
- println(gitlabProjects)
- println(gitlabBranchName)
- projectIds = GetProjectsId(gitlabGroupName, gitlabProjects)
- switch(jiraEvent) {
- case "jira:issue_created":
- println(projectIds)
- for (id in projectIds){
- CreateBranch(id, gitlabBranchName, "master")
- }
- break
- default:
- println("error...")
- break
- }
- }
- }
- }
- }
- }
4. 效果验证
在Jira里面创建一个模块和issue, 关联项目;
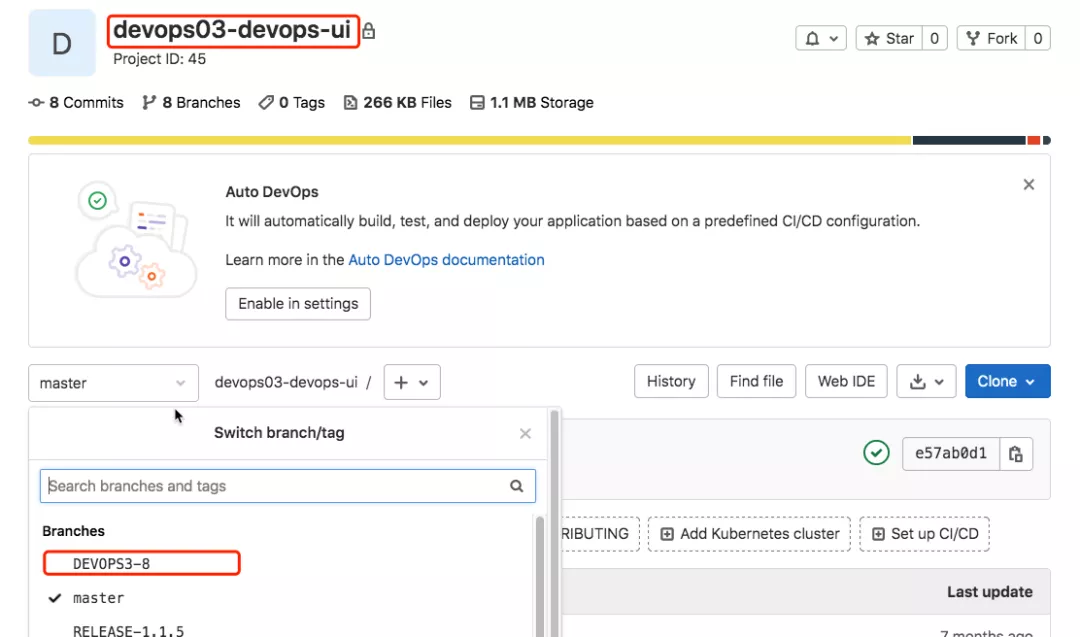
Jenkins 流水线运行;
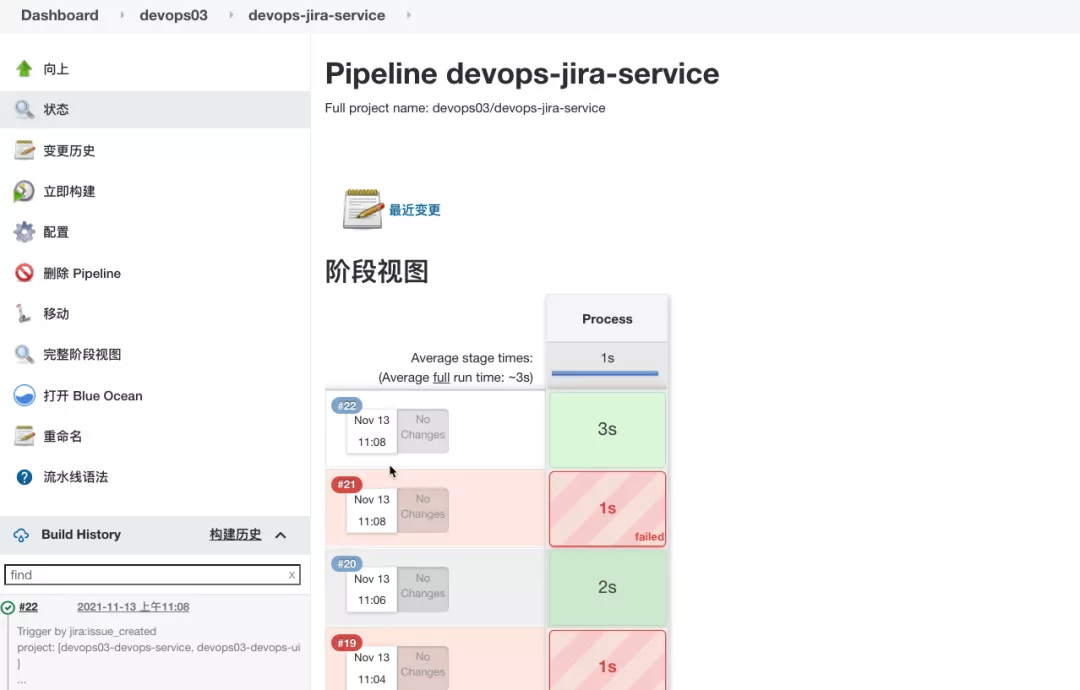
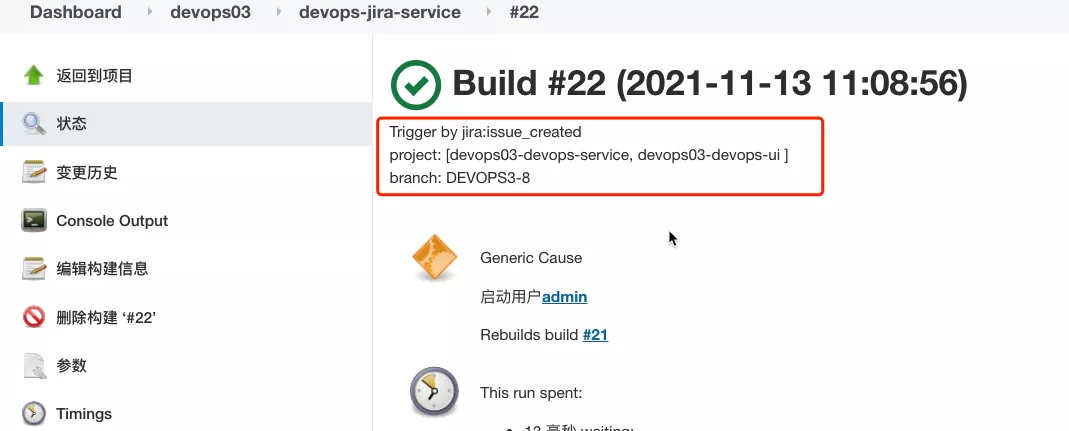
验证Gitlab中多了分支;

责任编辑:姜华 来源: DevOps云学堂 JenkinsAndroid自动化
(责任编辑:综合)
亚太卫星(01045.HK)年度纯利减少36.1% 每股盈利24.88港仙
 亚太卫星(01045.HK)发布公告,截至2020年12月31日止年度,公司收入8.89亿港元,同比减少16.3%;公司股东应占溢利2.31亿港元,同比减少36.1%;每股盈利24.88港仙,末期现金
...[详细]
亚太卫星(01045.HK)发布公告,截至2020年12月31日止年度,公司收入8.89亿港元,同比减少16.3%;公司股东应占溢利2.31亿港元,同比减少36.1%;每股盈利24.88港仙,末期现金
...[详细]AMD Link更新支持在电脑上运行 从一个PC串流到另一个
 AMD Link更新支持在电脑上运行 从一个PC串流到另一个作者:佚名 2021-04-26 14:02:37商务办公 AMD正在为其Radeon Adrenaline软件套装推出一个大更新,将改进远
...[详细]
AMD Link更新支持在电脑上运行 从一个PC串流到另一个作者:佚名 2021-04-26 14:02:37商务办公 AMD正在为其Radeon Adrenaline软件套装推出一个大更新,将改进远
...[详细]电脑使用独立显卡,怎么才能让独立显卡设置高性能,这样操作即可
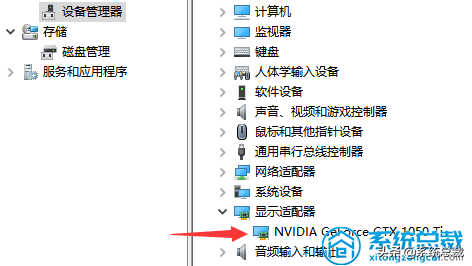 电脑使用独立显卡,怎么才能让独立显卡设置高性能,这样操作即可作者:系统总裁 2021-05-02 23:20:19商务办公 近期我接到后台留言板留言询问道:自身的电脑上在运行大中型游戏的情况下帧率不高
...[详细]
电脑使用独立显卡,怎么才能让独立显卡设置高性能,这样操作即可作者:系统总裁 2021-05-02 23:20:19商务办公 近期我接到后台留言板留言询问道:自身的电脑上在运行大中型游戏的情况下帧率不高
...[详细] 里程碑!RISC-V架构GPU来了作者:icbank 2021-02-04 14:31:30商务办公 美国的Pixilica已与RV64X合作,提出了一套新的图形指令集,旨在融合CPU-GPU ISA
...[详细]
里程碑!RISC-V架构GPU来了作者:icbank 2021-02-04 14:31:30商务办公 美国的Pixilica已与RV64X合作,提出了一套新的图形指令集,旨在融合CPU-GPU ISA
...[详细]同济科技(600846.SH):终止2017年度配股公开发行证券方案 维护投资者利益
 同济科技(600846.SH)公布,公司于2021年3月10日召开第九届董事会2021年第一次临时会议、第九届监事会第九次会议,审议通过了《关于终止公司2017年度配股公开发行证券方案的议案》,同意公
...[详细]
同济科技(600846.SH)公布,公司于2021年3月10日召开第九届董事会2021年第一次临时会议、第九届监事会第九次会议,审议通过了《关于终止公司2017年度配股公开发行证券方案的议案》,同意公
...[详细] “喜剧是一面镜子,观众会在台上的人物身上看到自己的荒谬。喜剧是一种治疗,因为你一旦看见了自己,一瞬间就被治愈了。”近期开播即火的《一年一度喜剧大赛第二季》又带领观众解读了“戏剧源于生活”的含义。无论是
...[详细]
“喜剧是一面镜子,观众会在台上的人物身上看到自己的荒谬。喜剧是一种治疗,因为你一旦看见了自己,一瞬间就被治愈了。”近期开播即火的《一年一度喜剧大赛第二季》又带领观众解读了“戏剧源于生活”的含义。无论是
...[详细]金立S8、vivo Xplay5、三星S7测评 五一小假期选一款适合的手机
 五一小假期一到,大家可能已经开始准备自己的出游计划了,而如何选择一款适合出游的手机可能是大家最关注的问题。既然是为了出游而准备的,那么必然拍照效果要好,不仅是能把沿途美景都能拍得好看,大家最喜欢的自拍
...[详细]
五一小假期一到,大家可能已经开始准备自己的出游计划了,而如何选择一款适合出游的手机可能是大家最关注的问题。既然是为了出游而准备的,那么必然拍照效果要好,不仅是能把沿途美景都能拍得好看,大家最喜欢的自拍
...[详细] 5G视频通话也救不了5G,5G的问题在于它自身作者:柏铭007 2022-04-28 16:24:47网络 4G/5G 三大运营商都测试5G视频通话,预计很快推出,业界人士认为5G视频通话将成为5G的
...[详细]
5G视频通话也救不了5G,5G的问题在于它自身作者:柏铭007 2022-04-28 16:24:47网络 4G/5G 三大运营商都测试5G视频通话,预计很快推出,业界人士认为5G视频通话将成为5G的
...[详细] 花呗还款日期由系统确定,以前是完全无法修改的,但自从支付宝调整了花呗还款日之后,目前针对开通签约满1年的花呗老用户开放了一个预约设置花呗还款日的功能,便可以实现修改。那么,具体怎么修改花呗还款日期呢?
...[详细]
花呗还款日期由系统确定,以前是完全无法修改的,但自从支付宝调整了花呗还款日之后,目前针对开通签约满1年的花呗老用户开放了一个预约设置花呗还款日的功能,便可以实现修改。那么,具体怎么修改花呗还款日期呢?
...[详细]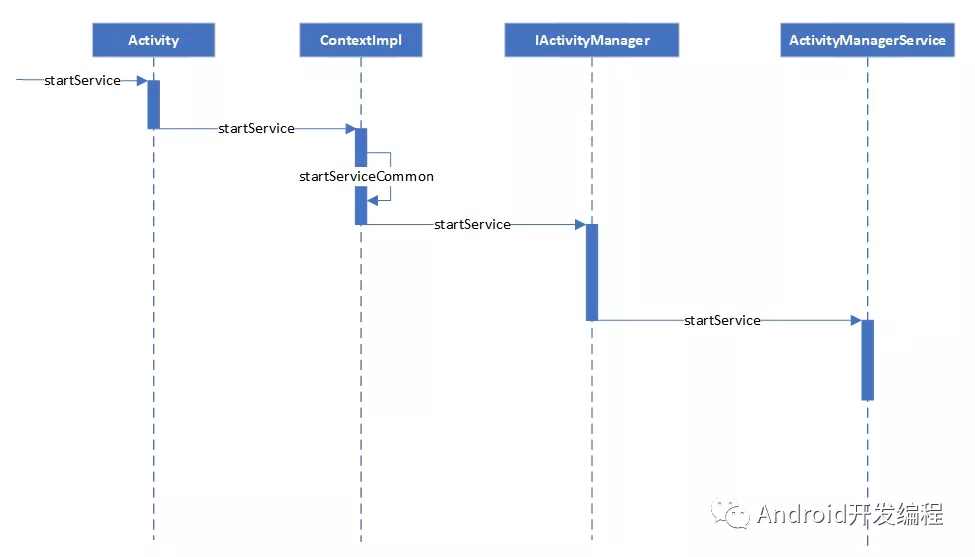 深入分析AMS启动流程作者:佚名Android开发编程 2021-10-29 16:36:53移动开发 Android AMSActivityManagerService)Android的核心服务之一
...[详细]
深入分析AMS启动流程作者:佚名Android开发编程 2021-10-29 16:36:53移动开发 Android AMSActivityManagerService)Android的核心服务之一
...[详细] 世界首台桩梁一体造桥机“共工号”投入使用 有效跨度48米
 值得推荐的Node镜像切换工具NRM
 面试官:Java中实例对象存储在哪?
 上热搜了!微信屏蔽淘口令:部分链接已无法正常打开
 国家统计局:1