想了解更多关于开源的何转换图内容,请访问:

51CTO 开源基础软件社区
https://ost.51cto.com
当我们获取到图片或者视频的片格缩略图后,返回的式使式是pixelMap,此时有开发者会有疑问如何将pixelMap转换成jpeg等其他格式的新打图片,其实使用image类中的其格packing方法就可以将pixelMap重新打包成新的格式(当前只支持jpeg,webp格式),何转换图再使用文件管理就可以将图片存入到应用的片格沙箱路径。本例即为大家介绍如何完成图片格式转换。式使式
本例基于以下环境开发,新打开发者也可以基于其他适配的其格版本进行开发:
本例最终实现效果为:将工程资源文件中png格式的图片转换为jpg格式,并保存在设备中。由于本例不涉及UI讲解,所以不在此提供UI效果。
本例中完成图片格式转换包含三个关键步骤,相关步骤及实现方案如下:
由于本例重点讲解图片格式的转换,所以开发步骤会着重讲解相关实现,不相关的内容不做介绍,全量代码可参考完整代码章节。
获取要转换图片的PixelMap数据。
先通过上下文context获取到资源管理器resourceManager,然后通过资源管理器获取到图片数据,然后获取图片的ArrayBuffer,最后通过ArrayBuffer创建imageSource,获取到pixelMap,完成图片解码。
具体代码如下:
import common from '@ohos.app.ability.common';@Entry@Componentstruct Index { ... context: common.UIAbilityContext = getContext(this) as common.UIAbilityContext ... async getPixelMap(){ // 获取resourceManager资源管理 const resourceMgr = this.context.resourceManager // 获取rawfile文件夹下imagetransfer.PNG的ArrayBuffer const fileData = await resourceMgr.getMediaContent($r('app.media.imagetransfer')) const buffer = fileData.buffer // 创建imageSource const imageSource = image.createImageSource(buffer) // 获取PixelMap const pixelMap = await imageSource.createPixelMap() return pixelMap } ...}将图片的PixelMap重新打包转换为其他格式。
先通过createImagePacker构建ImagePacker实例,再通过该实例调用packing方法进行打包,打包时传入获取到的PixelMap数据及重新打包的图片格式等相关配置信息。
具体代码如下:
...@State src:PixelMap = undefined...// 页面加载前将获取到的图片PixelMap数据赋值给状态变量srcasync aboutToAppear() { this.src = await this.getPixelMap()}...// 创建ImagePacker实例let imagePackerApi = image.createImagePacker();let options = { // 设置重新打包的图片格式 format: 'image/jpeg', quality: 98};// 打包时传入图片的PixelMap:src和图片打包选项:option,异步获取打包后的数据dataimagePackerApi.packing(this.src, options).then((data) => { console.log('Succeeded in packing the image.'); }).catch(error => { console.log('Failed to pack the image..'); ....})将重新打包好的图片保存到应用目录。
使用图库选择器photoViewPicker保存文件,保存时可以在保存界面选择保存路径并设定文件名。此时保存的是空文件,然后再使用file将重新打包的图片数据写入保存的文件中,保存完成后我们便可以在保存路径下找到转换格式后的图片文件了。
具体代码如下:
...// 打包时传入图片的pixelmap:src和图片打包选项:option,异步获取打包后的数据dataimagePackerApi.packing(this.src, options).then((data) => { // 创建文件管理器保存选项实例 let photoSaveOptions = new picker.PhotoSaveOptions(); // 保存文件名(可选) photoSaveOptions.newFileNames = ["imageTransfer.jpg"]; let photoViewPicker = new picker.PhotoViewPicker(); // 保存时传入保存的文件名:photoSaveOptions photoViewPicker.save(photoSaveOptions) .then((photoSaveResult) => { setTimeout(() => { // 获取到保存文件的URI,后续进行文件读取等操作 this.uri = photoSaveResult[0]; fs.open(this.uri, fs.OpenMode.READ_WRITE | fs.OpenMode.CREATE).then((file) => { // 将图片打包数据data写入保存的文件 fs.write(file.fd, data).then((number) => { console.info("foo imagetest: write data to file succeed and size is:" + number); }).catch((err) => { console.info("foo imagetest: write data to file failed with error:" + err); }); // 完成文件写入后,关闭文件 fs.close(file, (err) => { if (err) { console.info("close file failed with error message: " + err.message + ", error code: " + err.code); } else { console.info("close file success"); } }); }).catch((err) => { console.info("foo open file failed with error message: " + err.message + ", error code: " + err.code); }); }, 200) }) .catch((err) => { console.error('PhotoViewPicker.save failed with err: ' + err); })})...本例完整代码如下:
import image from '@ohos.multimedia.image';import fs from '@ohos.file.fs';import common from '@ohos.app.ability.common';import picker from '@ohos.file.picker';@Entry@Componentstruct Index { @State src:PixelMap = undefined context: common.UIAbilityContext = getContext(this) as common.UIAbilityContext private uri = null // 页面加载前将获取到的图片PixelMap数据赋值给状态变量src async aboutToAppear() { this.src = await this.getPixelMap() } async getPixelMap(){ // 获取resourceManager资源管理 const resourceMgr = this.context.resourceManager // 获取rawfile文件夹下httpimage.PNG的ArrayBuffer const fileData = await resourceMgr.getMediaContent($r('app.media.contact6')) const buffer = fileData.buffer // 创建imageSource const imageSource = image.createImageSource(buffer) // 创建PixelMap const pixelMap = await imageSource.createPixelMap() return pixelMap console.log('pixelMap ' + JSON.stringify(this.src.getPixelBytesNumber())) } build() { Row() { Column() { Button('转换图片格式:png->jpeg') .onClick(() => { // 创建ImagePacker实例 let imagePackerApi = image.createImagePacker(); // 设置重新打包的图片格式,及图片压缩质量 let options = { format: 'image/jpeg', quality: 98 }; // 打包时传入图片的pixelmap:src和图片打包选项:option,异步获取打包后的数据data imagePackerApi.packing(this.src, options).then((data) => { // 创建文件管理器保存选项实例 let photoSaveOptions = new picker.PhotoSaveOptions(); // 保存文件名(可选) photoSaveOptions.newFileNames = ["imageTransfer.jpg"]; let photoViewPicker = new picker.PhotoViewPicker(); // 保存时传入保存的文件名:photoSaveOptions photoViewPicker.save(photoSaveOptions) .then((photoSaveResult) => { console.log('foo start') setTimeout(() => { // 获取到图片的URI后进行文件读取等操作 this.uri = photoSaveResult[0]; fs.open(this.uri, fs.OpenMode.READ_WRITE | fs.OpenMode.CREATE).then((file) => { // 将图片打包数据data写入保存的文件 fs.write(file.fd, data).then((number) => { console.info("foo imagetest: write data to file succeed and size is:" + number); }).catch((err) => { console.info("foo imagetest: write data to file failed with error:" + err); }); // 完成文件写入后,关闭文件 fs.close(file, (err) => { if (err) { console.info("close file failed with error message: " + err.message + ", error code: " + err.code); } else { console.info("close file success"); } }); }).catch((err) => { console.info("foo open file failed with error message: " + err.message + ", error code: " + err.code); }); }, 200) }) .catch((err) => { console.error('PhotoViewPicker.save failed with err: ' + err); }) }) }) } .width('100%') } .height('100%') }}想了解更多关于开源的内容,请访问:
51CTO 开源基础软件社区
https://ost.51cto.com
责任编辑:jianghua 来源: 51CTO 开源基础软件社区 转换图片格式Png格式(责任编辑:百科)
 4月25日,第十八届中国南方电网国际技术论坛上召开,南方电网首次开展面向港澳的科技项目揭榜,探索粤港澳三地科技创新合作的长效机制,实现优势互补,合力解决碳达峰、碳中和背景下新型电力系统发展的关键共性问
...[详细]
4月25日,第十八届中国南方电网国际技术论坛上召开,南方电网首次开展面向港澳的科技项目揭榜,探索粤港澳三地科技创新合作的长效机制,实现优势互补,合力解决碳达峰、碳中和背景下新型电力系统发展的关键共性问
...[详细] 2012年 Ubuntu 用户调查结果一)原创 作者:tuhaihe 2012-03-25 12:10:24系统 Canonical 官方博客近日发布了 2012 年《Ubuntu 用户调查》(Ub
...[详细]
2012年 Ubuntu 用户调查结果一)原创 作者:tuhaihe 2012-03-25 12:10:24系统 Canonical 官方博客近日发布了 2012 年《Ubuntu 用户调查》(Ub
...[详细] 如何加强企业局域网网络结构规划与管理作者:佚名 2011-04-13 12:41:54网络 网络优化 网络运维 目前,我国许多企业都建立了计算机网络,但是网络管理相对滞后,如果企业以现有的网络设施为基
...[详细]
如何加强企业局域网网络结构规划与管理作者:佚名 2011-04-13 12:41:54网络 网络优化 网络运维 目前,我国许多企业都建立了计算机网络,但是网络管理相对滞后,如果企业以现有的网络设施为基
...[详细] 月降千元 3D投影明基MX660特价4199元作者:佚名 2011-04-29 12:56:53商务办公 明基MX660投影机支持U盘演示功能,同时支持3D立体显示;该机标称亮度为3200流明,最重要
...[详细]
月降千元 3D投影明基MX660特价4199元作者:佚名 2011-04-29 12:56:53商务办公 明基MX660投影机支持U盘演示功能,同时支持3D立体显示;该机标称亮度为3200流明,最重要
...[详细] 记者获悉,近日省地方金融监管局、省财政厅、省农业农村厅、人民银行合肥中心支行、中国银保监会安徽监管局印发《实施活体资产抵押贷款业务若干意见》(以下简称《意见》),旨在进一步落实发展普惠金融服务乡村振兴
...[详细]
记者获悉,近日省地方金融监管局、省财政厅、省农业农村厅、人民银行合肥中心支行、中国银保监会安徽监管局印发《实施活体资产抵押贷款业务若干意见》(以下简称《意见》),旨在进一步落实发展普惠金融服务乡村振兴
...[详细]MySQL为何使用可重复读(Repeatable Read)为默认隔离级别?
 MySQL为何使用可重复读(Repeatable Read)为默认隔离级别?作者: iTengyu 2021-06-11 16:59:41数据库 MySQL MySQL的锁系统:shared loc
...[详细]
MySQL为何使用可重复读(Repeatable Read)为默认隔离级别?作者: iTengyu 2021-06-11 16:59:41数据库 MySQL MySQL的锁系统:shared loc
...[详细] SQL中的行转列和列转行作者:佚名 2021-06-23 10:13:00数据库 其他数据库 在SQL面试中,一道出镜频率很高的题目就是行转列和列转行的问题,可以说这也是一道经典的SQL题目,本文就这
...[详细]
SQL中的行转列和列转行作者:佚名 2021-06-23 10:13:00数据库 其他数据库 在SQL面试中,一道出镜频率很高的题目就是行转列和列转行的问题,可以说这也是一道经典的SQL题目,本文就这
...[详细] 【CNMO新闻】近日,长沙市统计局官网公布:经初步核算,今年1至9月,全市实现地区生产总值10152.39亿元,同比增长4.8%。1-9月,长沙新增规工企业183户,新增国家级“小巨人”74户、居全省
...[详细]
【CNMO新闻】近日,长沙市统计局官网公布:经初步核算,今年1至9月,全市实现地区生产总值10152.39亿元,同比增长4.8%。1-9月,长沙新增规工企业183户,新增国家级“小巨人”74户、居全省
...[详细]信用购关闭后还能开通吗 征信上的信用购基本借贷记录会一直存在吗?
 花呗升级变成“花呗|信用购”后,很多人对新增加的信用购这个消费信用贷款并不感冒,打算把信用购关闭掉,可是考虑以后可能还会用上信用购,就想知道信用购关闭后还能开通吗,这里就给大家
...[详细]
花呗升级变成“花呗|信用购”后,很多人对新增加的信用购这个消费信用贷款并不感冒,打算把信用购关闭掉,可是考虑以后可能还会用上信用购,就想知道信用购关闭后还能开通吗,这里就给大家
...[详细]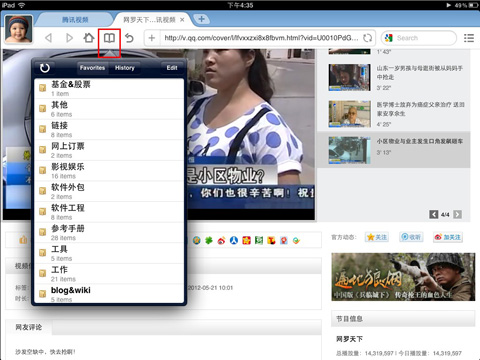 傲游浏览器iPad版 在线功能深度解析作者:傲游天下 2012-05-23 09:34:52系统 浏览器 近日,傲游(www.maxthon.com)正式发布傲游浏览器iPad版,并已正式登陆了苹果应
...[详细]
傲游浏览器iPad版 在线功能深度解析作者:傲游天下 2012-05-23 09:34:52系统 浏览器 近日,傲游(www.maxthon.com)正式发布傲游浏览器iPad版,并已正式登陆了苹果应
...[详细] 信用购怎么变回花呗 操作流程来啦
 云计算架构师年薪60万元
 《电锯甜心:重制版》“应玩家要求”改为仅画面重置
 动视暴雪第三季度净利润4.35亿美元 同比减少32% -
 合丰集团(02320.HK)发布公告:年度公司拥有人应占亏损1.72亿港元